

Today we will go through step-by-step guides and offer tips on how to process AP payments in Microsoft Dynamics 365 Business Central. We will look at a traditional check run, printing and voiding checks, unapplying a vendor ledger entry and reversing a journal posting.
How to do a Traditional Check Run using Suggest Vendor Payments
- Type “payment journal” in the main search bar.
- Select the Batch name. (example: PMT REG). We recommend that you have a separate batch set up for your check run. Creating a batch allows you to create a work space while you are working.
- On the ribbon, click “Suggest Vendor Payments.”
IMPORTANT: It is important to understand the following:
- Summarize Per Vendor on the Suggest Vendor Payments dialogue page: Checking this option will summarize the entries into one line and show the net due in the payment journal. For example: If unchecked it would populate the journal with each open invoice that falls within your filters. In our example above, if I check this option, it will only bring in one line summarizing the net due.
- One Check per Vendor Per Document No on the Print Check dialogue page: If unchecked, one check for each invoice is printed. If checked, then one check with the multiple invoices listed on the check stub will be paid.

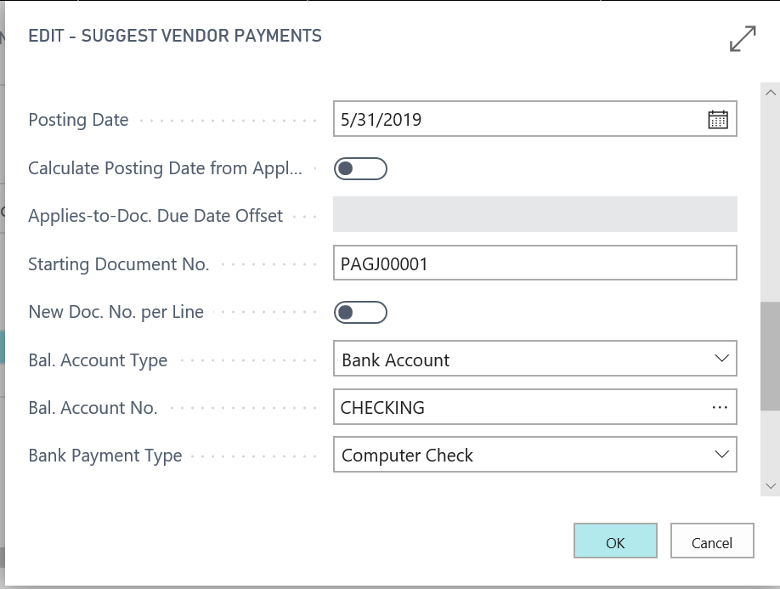
4. Fill in the appropriate fields as shown on the above two images:
- Last Payment Date: Only entries on or before this date are pulled.
- Find Payment Discounts
- Use Vendor Priority
- Available Amount
- Skip Exported Payments
- Summarize Per Vendor: One line for each vendor; if not checked, then one line for each invoice.
- By Dimension: Leave blank
- Posting Date: Date to post the check.
- Calculate Posting Date from Application: Leave unchecked
- Applies to Doc Due Date Offset: Leave blank
- Starting Document No: Automatically set if the number series is setup.
- New Doc No per line: Will automatically number the payment journal sequentially based on the starting document number. Leave unchecked.
- Bal Account Type: Bank Account
- Bal Account No: Bank Account No
- Bank Payment Type: Computer Check (or whatever is applicable)
- Enter any additional filters. When you have different Payment Method types, it is usually recommended to filter by Payment Method and process each type as a batch. This is very common.
- NOTE: If you wanted to print one check for each invoice for a vendor, you would check the New Doc. No. Per Line. Otherwise leave this unchecked.
How to Print Computer Checks From Suggest Vendor Payments
Based on the previous process, after the Suggest Vendor Payments process is done, the payment journal will populate with suggested payments. At this time you can do several things:
- Run a test report by choosing Actions, Posting Test Report.
- If you are doing ACH, you can perform the ACH process by Exporting the file for Transmission.
- Remove from the journal any entries you do not want to pay.
- Add to the journal an entry that didn’t populate automatically.
- Delete all lines and re-run the Suggest Vendor Payments.
- Filter the journal by a Vendor Number and process the check for that vendor individually.
- Simply print the checks.
- Once the journal is ready, click “Print Check” on the top of the ribbon, and the following page will appear.
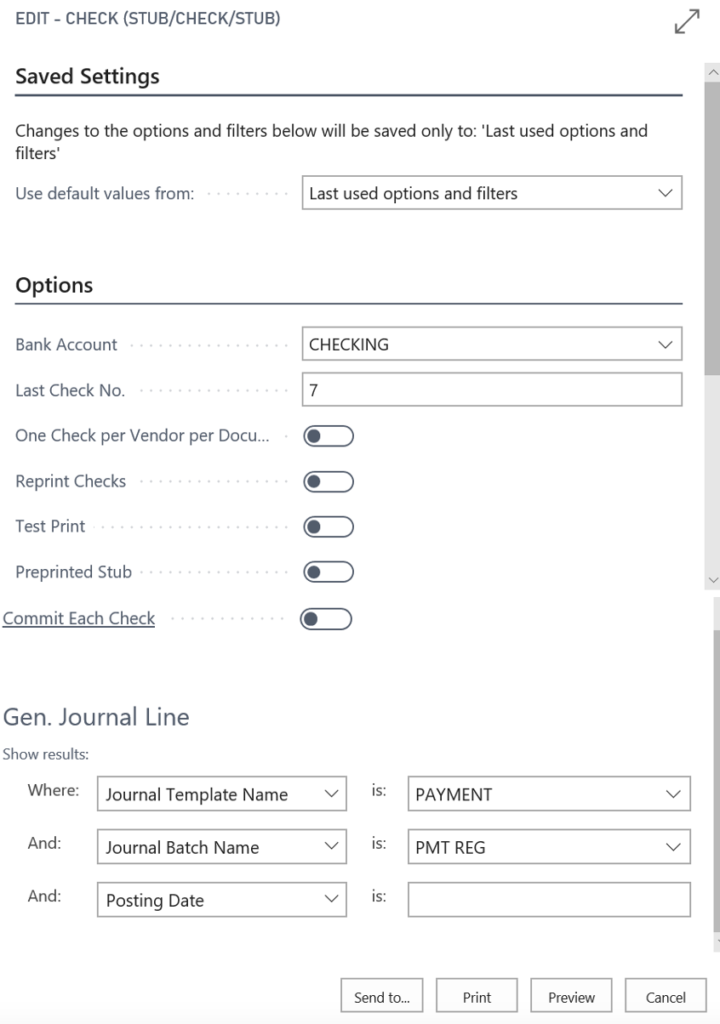
In our example, I filtered the journal to just print a check for Vendor 20000 so my print view is filtered to that. Key fields to populate:
- Bank Account: Enter Bank Account if not already populated
- Last Check No: Press tab and the last check number populates if the last check number was filled in on the Bank Account card.
- One Check Per Vendor: Indicates one check per vendor per document number. Leave unchecked.
2. Click “Print” on the bottom of this page. (Make sure the check stock is in the printer first).
3. Click “Print or Reprint” if this is a reprint of a check.
4. If all printed checks look good, go back to the Payment Journal page ribbon and click “Post.” This will remove the payment from the journal because it has been processed.
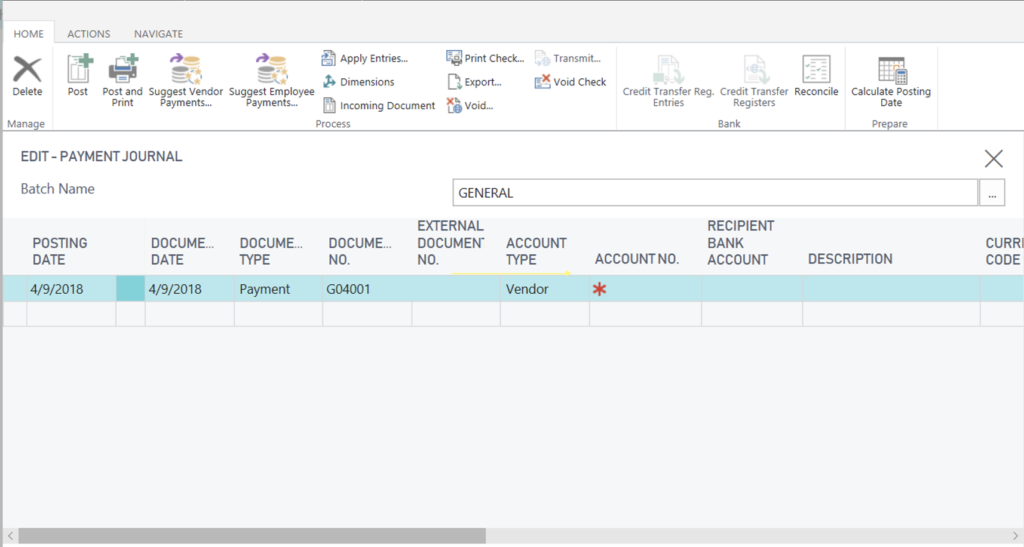
How to Print a Manual Check in Business Central
- To print a manual check, the process is the same as above except the Bank Payment Type equals Manual Check, and you usually enter the information in the journal manually. (You can still use the Suggest Vendor Payment and filter on the vendor number if you prefer.)
The following fields need to be filled in before posting the journal:
- Select the Batch Name
- Enter Posting Date
- Enter the Document Date
- Document Type: Payment
- Document #: Enter the check number
- Account Type: Vendor
- Account No: Choose the related vendor number
- Payment Method Code: Check
- Amount: = Enter amount (positive number)
- Applies to Doc No = Choose the related invoice
- Balance Acct Type: = Bank Account
- Balance Acct No: Bank Account No.
- Bank Payment Type: Manual Check
2. On the Payment Journal page ribbon, click “Post”and answer “Yes” to the message that appears.
How to Void a Printed Check in Business Central
- While on the payment journal, highlight the line that you need to void.
- On the ribbon, you will see both “Void” and “Void Check.” To void an individual check, click “Void Check.”
- If you need to void all checks in the check run, simply click “Void.”
- To reprint the check or checks, click “Print Check,” update the last check number and then check “Reprint.” The new check will print and if all is well, click “Post.”
How to Financially Void a Check
- When a vendor indicates he or she never received a check you mailed, you must assume it is lost. You must void this type of check from the Bank Account.
- Type “bank account” in the main search bar.
- On the Bank Account list page, highlight the related Bank Account.
- Click “Bank Account” and then click “Check Ledger Entries.”
- Highlight the check you need to void.
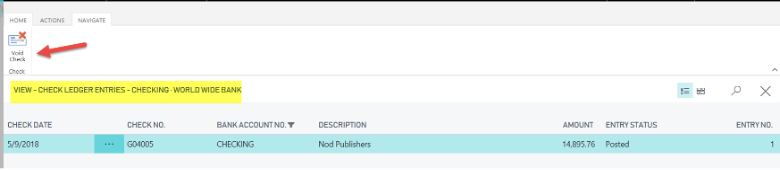
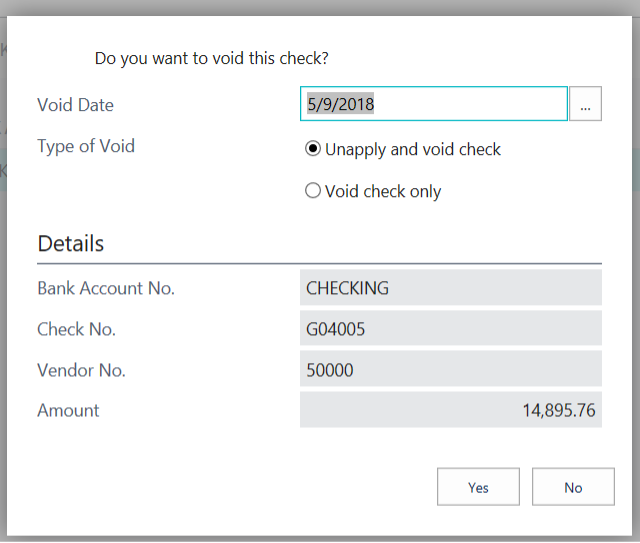
6. Click “Process,” then choose “Void Check.”
7. The following message will appear. Make sure the Void Date is correct and that the type equals Unapply and Void Check. Clicking “yes” will void the check and re-open the invoice. You can now print a check and re-send to the vendor.
How to Unapply a Vendor Ledger Entry
- Type “vendors” in the main search bar.
- On the Vendor List page, highlight the related Vendor record.
- On the ribbon, click the “Navigate” tab, then “Ledger Entries.”
- Highlight the line you want to unapply.
- On the ribbon, click the “Actions” tab, then choose “Unapply Entries.” The following page will appear that shows entries that were applied for that transaction.
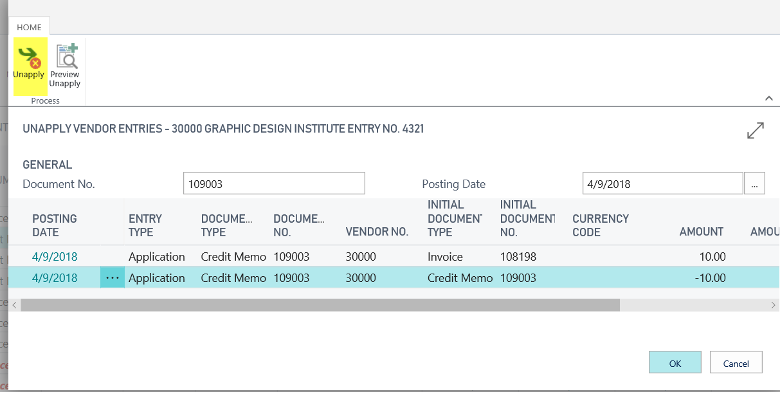
6. On the Unapply Vendor Ledger Entries page, click “Unapply” on the ribbon and then “Yes.”
How to Reverse a Journal Posting in Business Central
- Go to Departments/Financial Management/Payables.
- On the Vendor List page, highlight the related Vendor record.
- On the ribbon, click “Ledger Entries.”
- Locate the Ledger entry you want to reverse.
- On the ribbon, click “Reverse Transaction,” then click “yes.”