

Today, we’re going to talk about something super important for your financial reports: row definitions. If you’ve ever wondered how to make your financial statements more meaningful and accurate, you’re in the right place. In this blog we’ll walk you through the process of creating and modifying row definitions in Business Central, step by step.
What are Row Definitions?
In simple terms, row definitions determine what each row on your financial statement will display. This could be anything from revenue and expenses to specific account balances. By defining rows, you can customize your reports to show exactly what you need.
How to create Row Definitions in Business Central
- Search for Row Definitions: Open Business Central and use the search bar to look for “Row Definitions.” This will take you to the page where you can create and manage your row definitions.
- Create a New Row Definition: Click on the New button to start creating a new row definition. Give it a meaningful name and description. Optionally, you can also assign an Analysis View Name if you want to link it to a specific analysis view.
- Edit Row Definition: Select the row name you just created and click on Edit Row Definition. This is where the magic happens! You can also copy, export, or import existing row definitions if you want to save time.
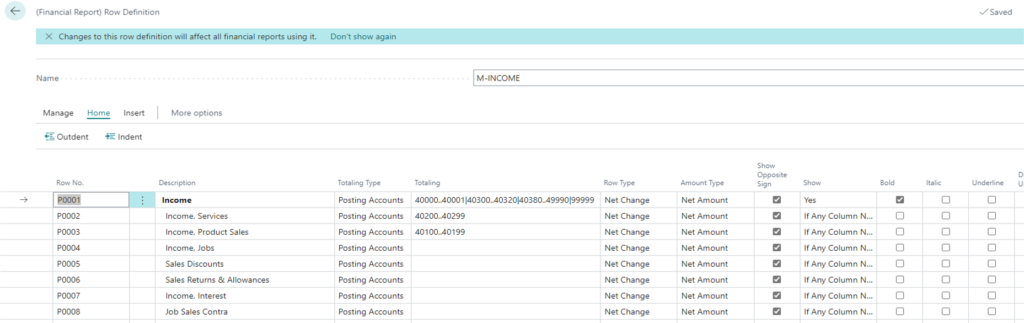
Row Definition details, explained
- Row No.: You will need to assign a unique number to each row. It’s a good practice to start with 1000 and increment by 10, just in case you need to insert new rows later.
- Description: Enter a description that explains what the numbers in this row represent. For example, you could use “Total Revenue” or “Operating Expenses.”
- Totaling Type: There are several options here:
- Posting Account or Total Account pulls values based on the specified GL account into the totaling column.
- Formula allows for basic calculations.
- Underline or Double Underline underlines the specified row. Note that there is also a check box column for this action.
- Set Base for Percent designates a beginning point for calculating percentages.
- Cost Type or Cost Type Total pulls values based on your Cost Account posting or totaling accounts into the totaling column.
- Cash Flow Entry or Cash Flow Total Accounts pulls values based on your Cash Flow Account posting or totaling accounts into the totaling column.
- Account Category pulls data from the GL Account Category.
- Statistical Account pulls data from the Statistical Account entries.
- Totaling: This is where you add the accounts or formulas needed based on the input of the totaling type.
- Dimensions Totaling 1-8: This is where you add any dimension filters that are specific to that row. Note that this is likely unique to your organization.
- Row Type: Select from three options depending on what you want to display. Net Change is typically used for Income Statements, Balance at Date for Balance Sheets, and Beginning Balance for Statements of Cash Flow.
- Amount Type: Choose between Net Amount, Debit Amounts, or Credit Amounts.
- Show Opposite Sign: Check this box if you want to reverse the balance. For example, sales normally have a credit balance, but you might not want to show negative sales on your report.
- Show: Decide whether you want to show or hide the selected row. You can simply check “Yes” or “No” or make it conditional based on these additional criteria: “If any column not zero,” “When Positive Balance,” or “When Negative Balance.”
- Formatting Options: You can make the row description bold, underline it, double underline it, hide the currency symbol, or start a new page after this row.
Note: If some of the columns above are not visible, you will need to personalize your page to add them back into your view.
Quick Tip: For faster report creation, you can use the Insert, Insert G/L Accounts feature to pull in GL accounts and descriptions quickly.
By customizing your row definitions in Business Central, you can create reports that are tailored to your organization’s needs, making it easier to analyze and understand your financial data. Remember, the key is to be clear and consistent with your row descriptions and totaling types.
In our next blog we will take a look at Column Definitions.