
Yesterday I detailed the initial steps on how to create a new Azure virtual machine in Microsoft Dynamics NAV. Today we will:
- Set up the DNS Name Label
- Add Inbound Security Rules
- Connect to the new virtual machine
- Initialize the new virtual machine
Set up the DNS Name Label
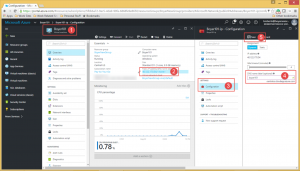
- Navigate to the virtual machine’s management console.
- Click on the Public IP address/DNS name label icon.
- Click on Configurations.
- In the DNS name label (optional) field, assign a name — in my example, I’ve used “boyer101.”
- Click on the Save button.
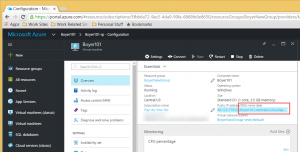
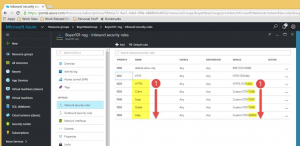
If done properly, the new DNS name label will be displayed as shown below.
Adding Inbound Security Rules to the Virtual Machine:
NOTE: Inbound Security Rules used to be called Endpoints in Azure’s classic virtual machines.
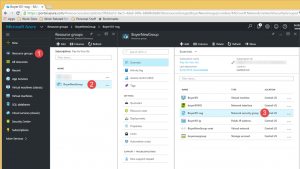
- From the Microsoft Azure console, click on Resource Groups.
- Click on the new Resource Group you created in the Basics virtual machine configuration screen above — I created the “BoyerNewGroup” group.
- Click on the resource which represents the network security group Type — mine is called “Boyer101-nsg.”
- Click on the Inbound security rule menu option.
- Click on Add.
- In the Add Inbound Security pane, type HTTP in the Name field.
- Chose the TCP Protocol option.
- Leave the Source Port Range field as it is — it should have a “*” sign in it.
- Type 80 in the Destination port range field.
- Click on OK.
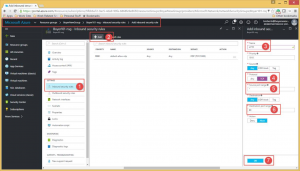
If you’ve set up the inbound security rule correctly, it’ll look as follows:

- Set up the five additional inbound security rules displayed below.
IMPORTANT NOTE: These ports can be finicky. Make sure you set them up exactly as shown below, using the exact name and destination port range shown below:
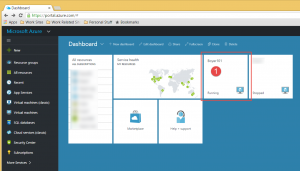
Connecting to the New Virtual Machine:
- From the Azure Dashboard, click on the tile for the new virtual machine you’ve created.
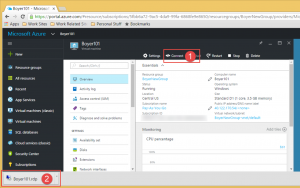
- On the virtual machine management console, click on the Connect button to download an RDP link to your newly commissioned virtual machine.
- Open the RDP link.
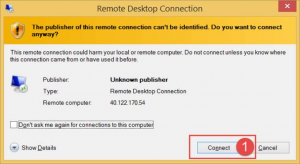
- On the Remote Desktop Connection window, click on the Connect button to continue to the login.
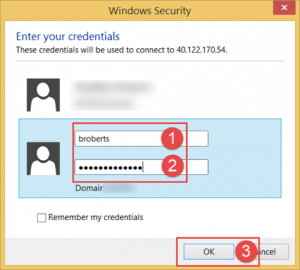
- On the Windows Security window, input your user name — this is the user name you established in the Basics configurations when setting up the virtual machine.
- Input your password — this is the password you established in the Basics configurations when setting up the virtual machine.
- Click on the OK button.
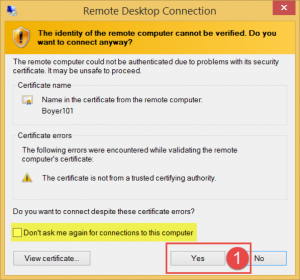
- On the Remote Desktop Connection window, click Yes. If you don’t want to receive this message again, you can click on the “Don’t ask me again for connections to this computer” option.
- If asked a question about networks, answer No. I missed that screen shot, so here’s the first image I saw when I Googled “cat” instead:

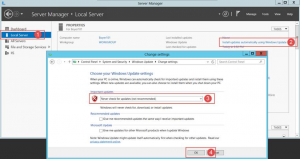
- In the Sever Manager console, click on the Local Server button.
- Click on the Windows Update – Install updates automatically using Windows Updates icon.
- On the Change settings screen, change the Important updates option to Never check for updates (not recommended).
- Click on OK.
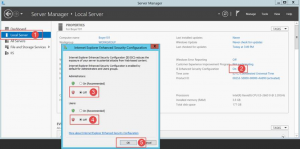
- Stay on the Local Server menu.
- Click on the IE Enhanced Security Configuration – On icon.
- Select the Off option under the Administrators: section.
- Select the Off option under the Users: sections.
- Click OK.
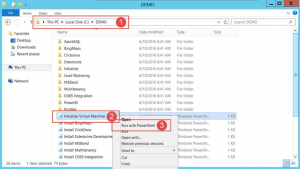
Initialize the Virtual Machine:
- Open up File Explore and navigate to C:\DEMO.
- Right click on the Initialize Virtual Machine PowerShell script and chose the Run with PowerShell menu option.
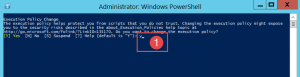
- When asked about the Execution Policy Change, hit the “y” key and then hit Enter.
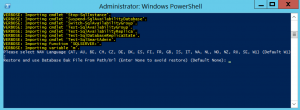
- When asked to select NAV language, hit Enter.
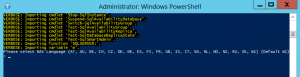
- Hit Enter again, at the following prompt.
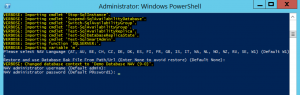
- To accept the default username, hit Enter when asked for a username — default username is admin.
- To accept the default password, hit Enter when asked for a password — default password is P@ssword1.
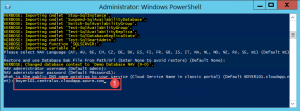
- Type in the DNS name label configured above and hit Enter — my label was “boyer101.centralus.cloudapp.azure.com.”
Stay tuned for tomorrow’s blog where we will test the setup and connections of our new NAV demo virtual machine.