

Microsoft Dynamics 365 Business Central lets you change which layout you want to use on any given report as well as create a new layout or modify an existing layout. This is a visual how-to guide on creating, editing and using custom reports in Business Central.
Add a new Custom Report Layout in Business Central
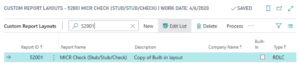
Under the main search bar in Microsoft Dynamics 365 Business Central, type in “custom report layouts.”
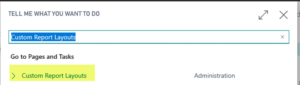
From the Custom Report Layout page, select “New.”

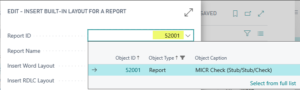
Enter the Report ID or use the drop-down option to locate the desired report. The name auto-populates.
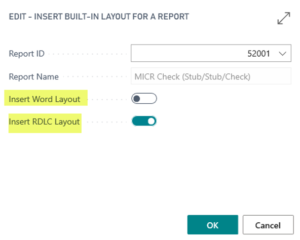
Use the radio buttons to select the desired layout to insert (Word or RDLC). If you aren’t sure which one you want, select both. At least one selection must be made. Select “OK” to insert the layout.
The reports are now copied and ready to be modified.
Edit a Report Layout in Business Central
From the Custom Report Layout page, select Layout, then Export Layout.
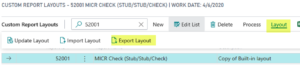
This exports the layout, which can be opened or saved for editing.

When done editing, import the layout from the Custom Report Layout page by selecting Layout, then Import Layout.

Test the report from the Custom Report Layout page by selecting Process and then Run Report.

When the layout is the format desired, from the Custom Report Layout page, select Layout and then Update Layout.

Update a Report Selection in Business Central
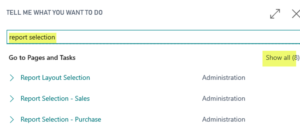
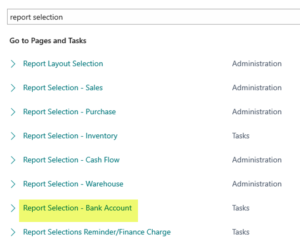
In the main search bar of Business Central, start typing in “report selection.” Select “Show All” if the desired selection is not shown.
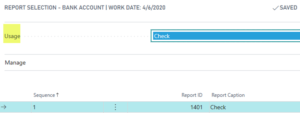
Go to the desired location. The below example is a check so “Report Selection — Bank Account” has been selected.
Select “Usage = Check.” The current report is displayed as you can see below:
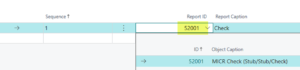
Enter the new Report ID.
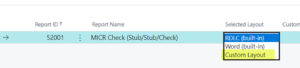
How to Use a Custom Report Layout in Business Central
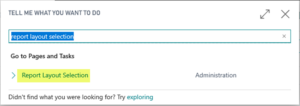
In the main search bar, search for Report Layout Selection.
Filter for the desired report.
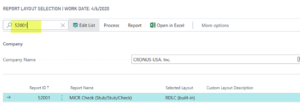
In the Selected Layout, select “custom layout.”
Use AssistEdit in the Custom Layout Description to bring up the list of Custom Layouts that are available in your system.

Highlight the desired layout and select “OK.”
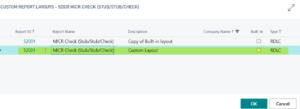
In this example, the Custom Layout for report 52001 will be used when printing checks.